Trigger Word Detection
Welcome to the final programming assignment of this specialization!
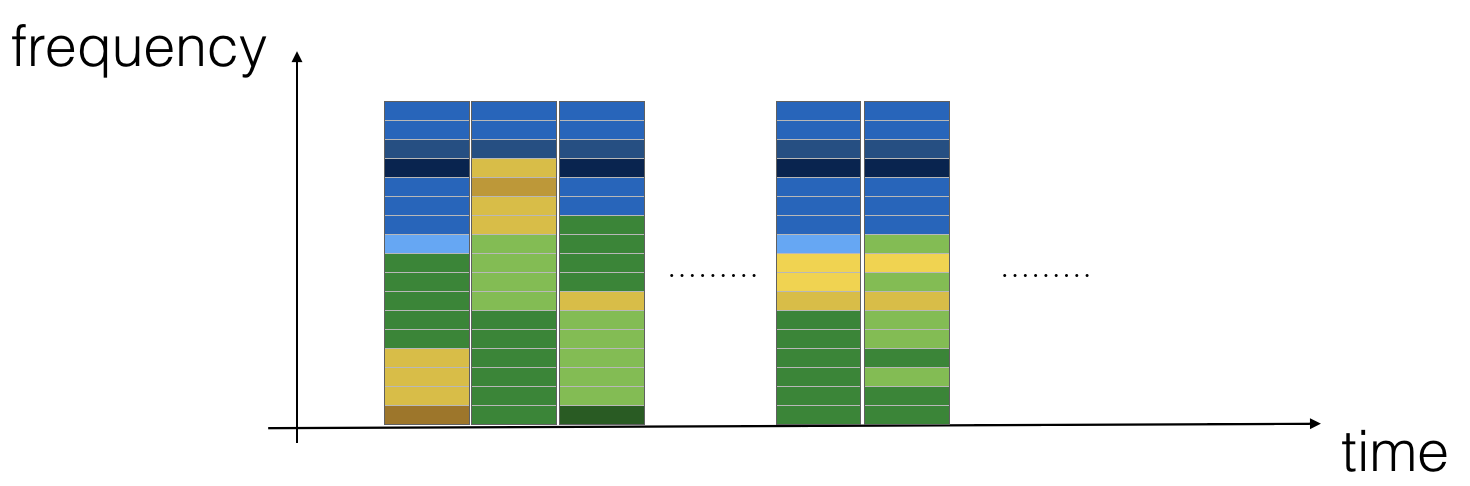
In this week's videos, you learned about applying deep learning to speech recognition. In this assignment, you will construct a speech dataset and implement an algorithm for trigger word detection (sometimes also called keyword detection, or wake word detection).
- Trigger word detection is the technology that allows devices like Amazon Alexa, Google Home, Apple Siri, and Baidu DuerOS to wake up upon hearing a certain word.
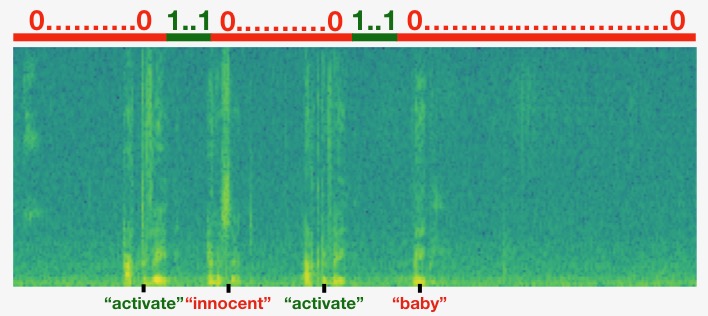
- For this exercise, our trigger word will be "Activate." Every time it hears you say "activate," it will make a "chiming" sound.
- By the end of this assignment, you will be able to record a clip of yourself talking, and have the algorithm trigger a chime when it detects you saying "activate."
- After completing this assignment, perhaps you can also extend it to run on your laptop so that every time you say "activate" it starts up your favorite app, or turns on a network connected lamp in your house, or triggers some other event?

In this assignment you will learn to:
- Structure a speech recognition project
- Synthesize and process audio recordings to create train/dev datasets
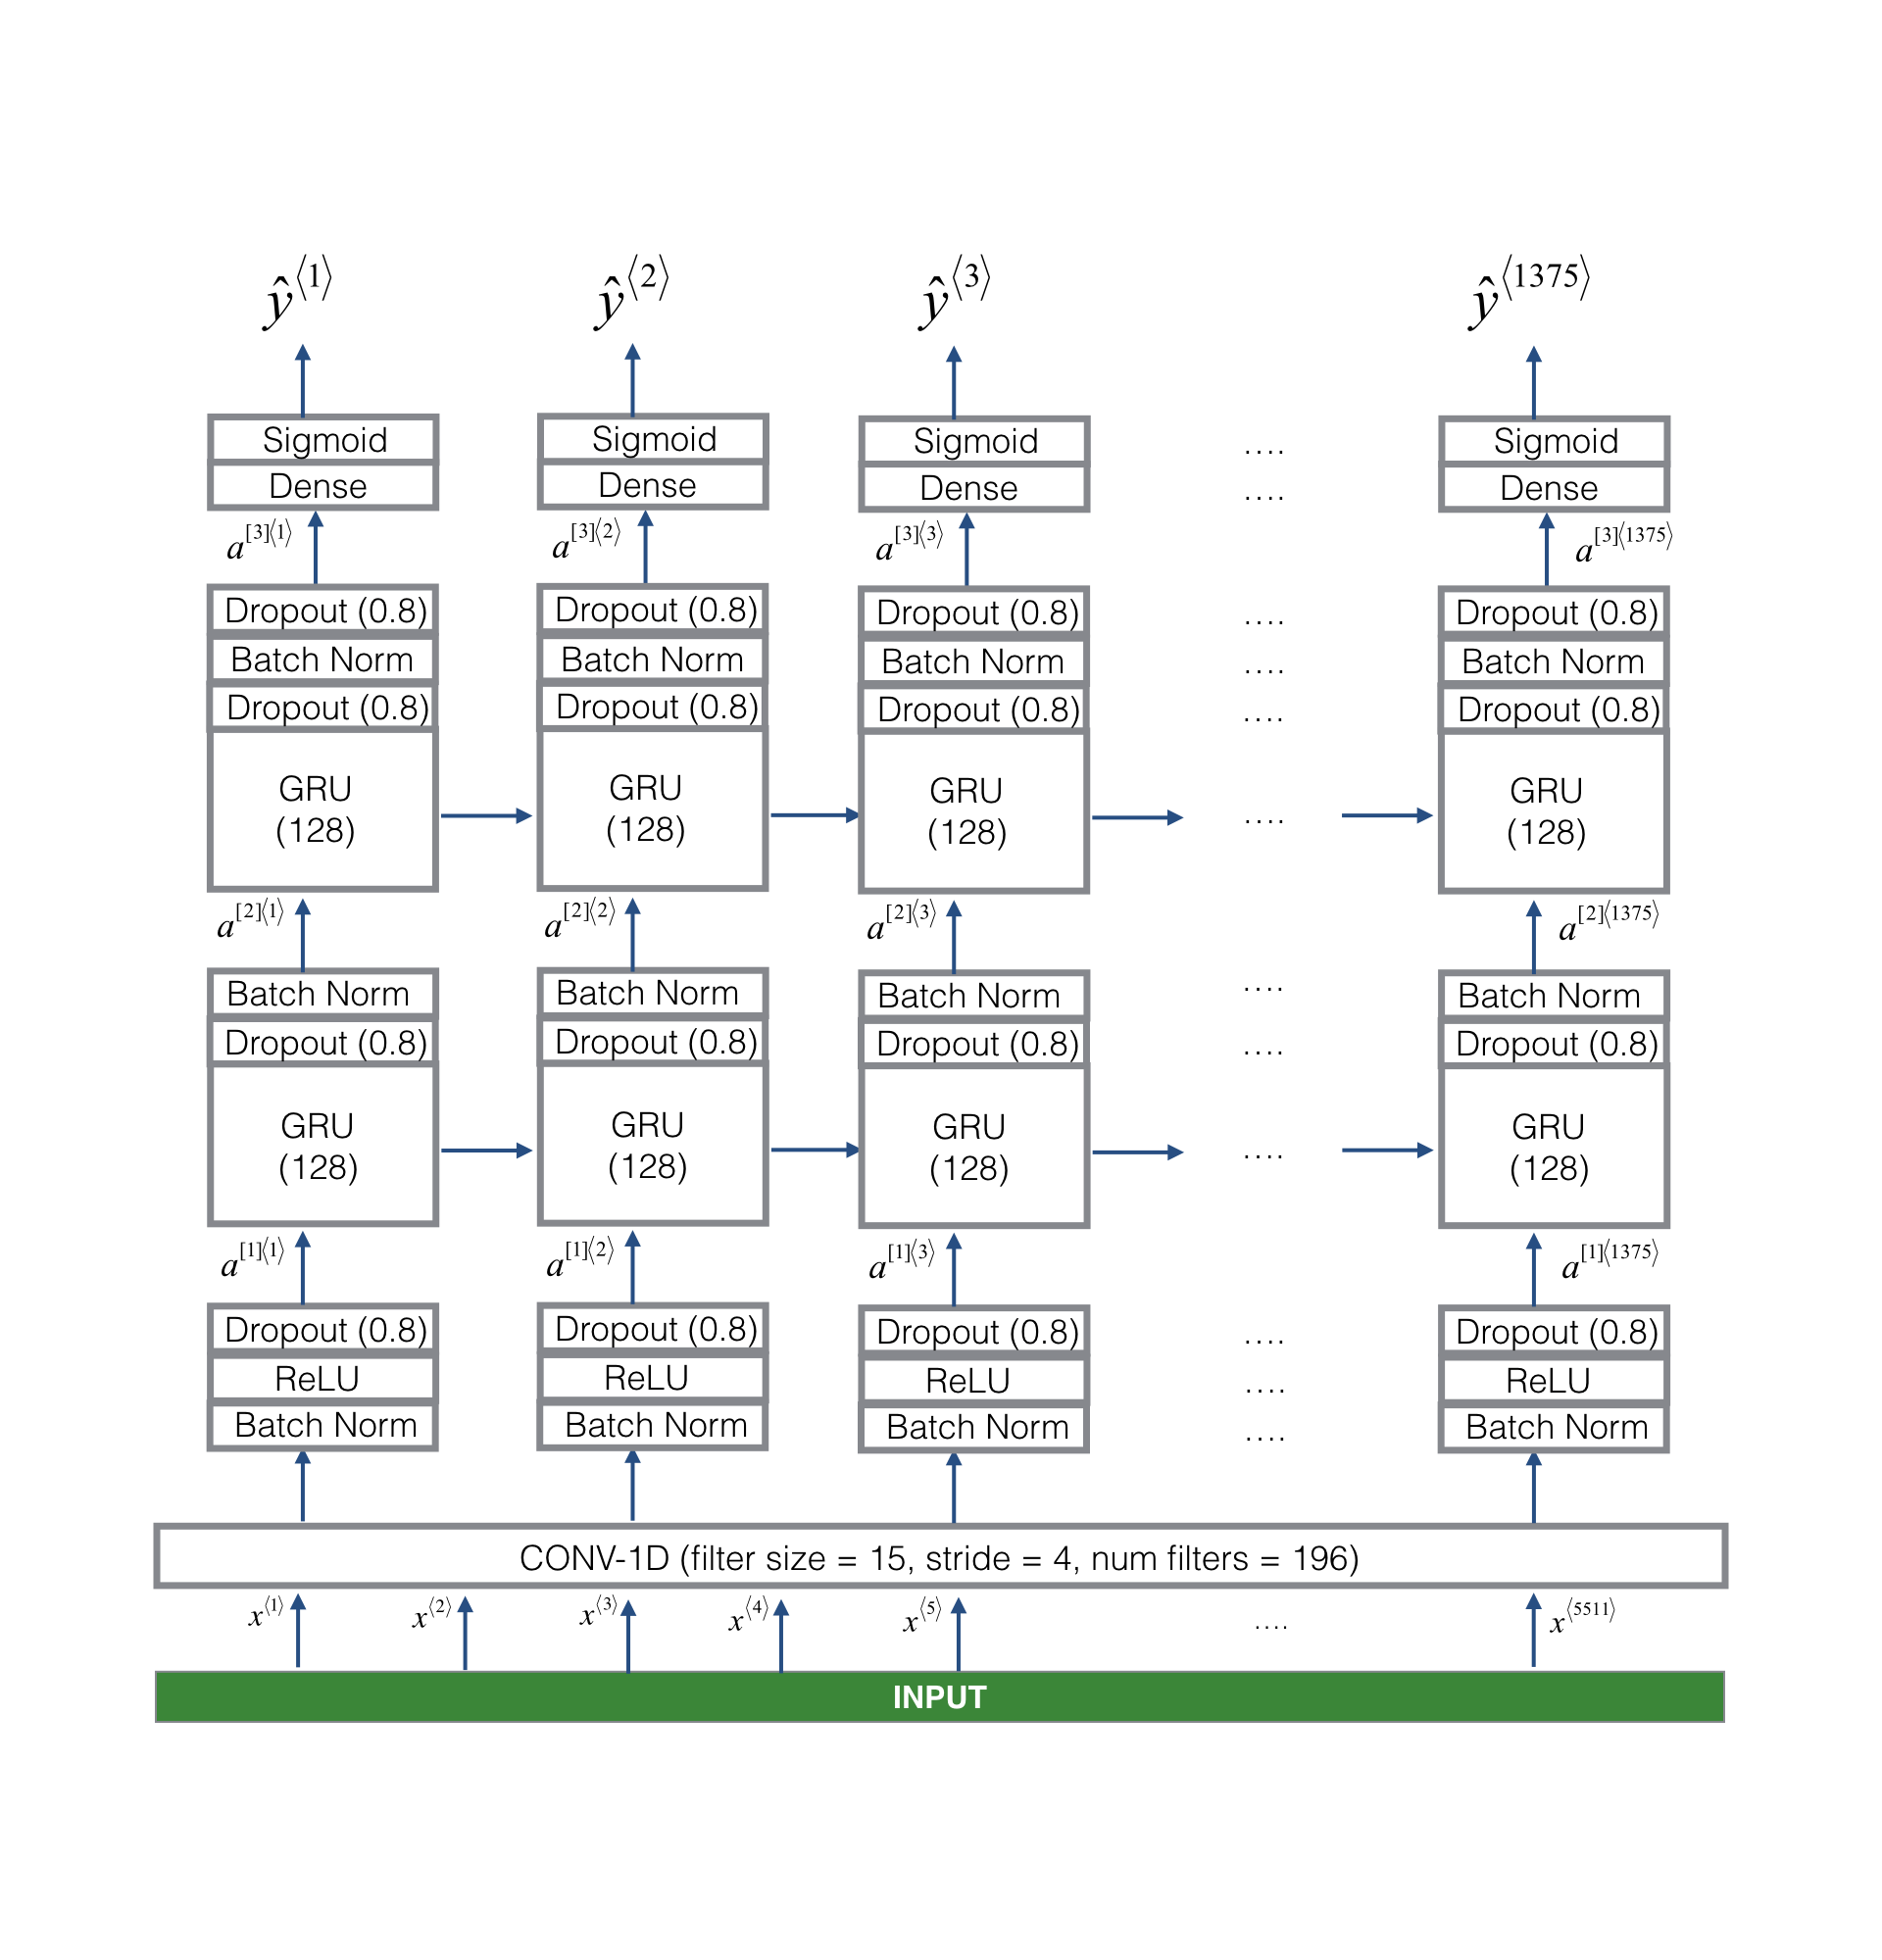
- Train a trigger word detection model and make predictions